Category Archives: Photography

Lightroom Basics #1

In this series of Lightroom articles, I will be looking at the “Why” more than the “How”. So many tutorials show you how to work with Lightroom but they leave off the reasoning behind the actions. I have always been one of those who wanted to know the “Why” things work the way they do.  This dissertation is not a  “how to” manual. You will probably need a book or tutorial to actually follow along and do the action. The purpose of this series is to give you the background information so you can make intelligent decisions when you use Lightroom.

Lightroom #5  is divided into 7 Modules. Each Module or section allows you to work on your picture files for different purposes.  If you ask yourself, “What do I want to do in Lightroom?”, the answer will be one of the modules.  Today, I will talk about the Library Module.

Let me start out by saying, “Lightroom does NOT have a folder for storing your picture files!” It has a CATALOG file for keeping track of your picture files. STOP. Think about that a minute.  Lightroom DOES NOT make a second copy of your pictures when you add pictures to the Lightroom Catalog.  If you have a folder for pictures on your Hard Drive in your computer, perhaps called “My Pictures”, you can tell Lightroom to catalog those pictures. Lightroom, called LR from now on, does not move those pictures into a special LR picture folder; nor does it make a new copy of those pictures; rather, it just makes a notation where the picture is and stores information about that picture file in the LR catalog.  That was a long sentence, you might want to read it again and think about it. It is very much like an old card catalog in the Library; where each book has a card that tells where the book is on the shelf.  This analogy is so close that I will use it may times during this explanation of LR.

When you first start up LR, you will be telling it to look for picture files in a folder on your computer or on an external hard drive. Then, you tell it that you want it to add information about those pictures into its catalog.

You will use the IMPORT button, while in the Library mode, to bring up the import screen.  First, You will tell LR where the files are stored. You do this by pointing out the location in the left column where drive folders are listed. By going to the location of your picture files you want to add to the catalog you are telling LR the current location of the pictures.  Then you will choose the ADD button at the top to to perform this action.  At that point, LR will go through all the picture files you have stored at the given location and create cards for the LR card catalog for each picture (file).  The file will not contain the actual picture file but it will save a small preview picture and meta data (date of picture, camera settings and other information added later) but most importantly, it will store the location of the picture file.

Let’s go back to the library analogy. When the books are stored on the shelf in the library, they are stored by subjects.  If you know your way around the library, you can skip the card catalog (now on computers) and go directly to the stacks because you know that the photography books are  all together in a specific place in the library. You can go there and look through all the books on the shelf and find a title you want to read.  Imagine now, what it would be like if the books were just stacked randomly without any groupings. What if the books were just added to the shelves in order of when they were purchased.  At this point, you would HAVE TO go to the catalog first to see where your book might be.  When you went to the shelves to find the book you looked up, you would not find any other books similar in nature close by for comparison. This process would be very unproductive.  What if you went in and the computers were down? The library, full of information would be worthless! The more books the library had the more worthless they would be without proper organization and a card catalog.

Lightroom is the same way. To make LR as useful as possible, your pictures should be stored in an organized way.  My pictures are stored by subject matter.  The first thing to do is have one folder with  ALL other picture folders in it. If you are on a Windows PC, the “MY PICTURES” folder is an example. That works just fine. Inside that folder, you don’t want to just  dump the pictures randomly. That would be like storing snapshots in a garbage bag. Sure, they are all there together but how can you find Uncle Bill’s wedding picture?

I have my pictures divided into  19 sub folders inside “my Pictures”. Mine start with “FAMILY” then “FRIENDS” followed by “TRAVEL” and 16 other folders.  The “FAMILY” folder contains more folders; like a folder for my wife and I along with our kids (“Our Family”). Then there is a folder for my wife’s family. In the “OUR FAMILY”, you will find folders for each of us and each of our kids.  While LR makes it easy to find pictures with the various search methods, I can find pictures even without LR.  This means, if I lost the LR catalog and just had my original picture files, I would still have the access of all my pictures.

If you are just planning to install LR, I recommend organizing your pictures first in groupings of folders nested inside larger folders. I know some people who sort their pictures by date.  With a small quantity of pictures, this might be workable but as you collect more and more pictures, dates are hard to remember. Remember Uncle Jim’s wedding picture? When was that?  Sure, you can call someone or look in your date book to determine the date but for me it is easier to go to: Family > Pat’s family> Bill> Bill’s wedding> wife #4.

Once you install LR and have the catalog set up, it is VERY important to make all future changes to the organization from within LR. As long as you do this, LR will keep track of the new locations. If you just go to “MY PICTURES” and move files around, LR will not know where they have gone.

Most of the Hype about LR revolves around the Develop Module because that is the part that makes pictures look good but the real value of LR is the cataloging.  When you have tens of thousands of pictures, being able to locate them is of primary importance.  LR makes it easy to organize them.

Next Lightroom post will talk about keywords and other importing options.

The Lightkeeper

Florida LighthouseOnce upon a time, far away in the land of Awesomebeauty, there was a beautiful lighthouse.  The keeper of this lighthouse was named Canon Wealder. He was a rather short  and obviously was well fed by his wife Nikon.  Canon was better known to his friends by his nickname Photog. He was the town photographer and his pictures were known far and wide.  He loved his town and he loved his lighthouse because both gave him the opportunity to take many beautiful pictures.

Every day, he would scour the countryside for beautiful sights to capture with his lens. If there were a storm brewing, he might spend the day up in the tower leaning on the outside railing with his trusty camera hanging at his side. As a new and unusual cloud or squall line formed, he would raise his camera, compose the perfect shot and slowly push down on the shutter button.  CLICK, went the shutter and another slice of time was imprisoned on his film.

At night, he would go down in the basement level to his darkroom and carefully develop his negatives. He was a true artist with his camera and also in his darkroom. He would hang out his negatives to dry and when dry, he would put them in a folder with a note about each shot.  As the years went by, his collection of photos grew larger and larger. He had multiple file cabinets full of pictures.  He had to devote an entire storage room next to the darkroom for the storage.

One day, when he was looking through the files for a particular negative of his niece’s wedding, he thought to himself, “There must be a better way!”  He thought about the County Library and the way they sorted their books and had index cards to tell where the books were on the shelf.  “That’s it,” he thought. You will remember that he made notes on every picture taken and attached those notes to the pictures in the file folders. “Why not make a card catalog with these  notes.” came a voice in his head. He went down to the storage files and put a descriptive name on each file cabinet and a more descriptive name on each drawer. Then he went through his thousands of file folders. He would take a file folder and remove the page with the picture notes. After determining the content of the folder, he would find the descriptive cabinet and drawer and place the folder in the drawer but not before he had named the folder. Next he made an additional notation on the the file page he had removed. As an example, he might find a folder with pictures from the city garden and place it in the “landscape” file cabinet and in the “city” drawer. He would then mark the folder “city garden”.  On the folder note page, he would note the location; Landscape > City > City Garden.  Success! It took several weeks to get the folders all organized but when he was finished, finding a picture was easy.

The next step was to make the index cards for his catalog.  For nearly a month, he sat at his desk transferring the information from the note pages onto the index cards.  Each picture had a card.  The heading for the card was a short description of the picture. An example might be ” Michelle’s wedding – kiss at alter” . Below that, was any notes he had made about this picture like date, location, and people in the shot. The most important part of this note card was the location of the negative.  Portraits > Family > Michelle’s wedding.

 It was a work of art, this newly devised cataloging system.  His picture negatives were safely stored in the basement storage room next to the Dark Room. There were even signs over the door; “Dark Room” and  “Light Room” .  On his card catalog, was a plaque, “Lightroom Catalog”

Now you might think that this would be the end of the story but it is not because at Photog’s death, his estate was distributed and some things sold. The Lightroom Catalog was separated from the negatives.  The negatives were kept by the Photog’s wife but somehow in her grief, she sold the catalog case.  She was never able to retrieve it. The only salvation was that Canon had sorted the negatives into descriptive files.  Nikon spent the rest of her life trying to rebuild the Lightroom Catalog with the limited information she had. The notes about each picture were lost forever But at least, she had the pictures.

The moral of this story is:  Drives crash and files are lost. Always store your picture files in descriptive folders to make recovery possible. Back up your Picture files regularly and back up your Lightroom Catalog as well. Make sure both are stored in a safe place.  As I think about it, while it is not practical for me to try to store my more than 125,000 pictures to the cloud, storing a copy of the Lightroom Catalog might be a good idea.

Lightroom is a miraculous software.  Don’t underestimate the value of the “Library module”. The “Develop Module is great to make your pictures look better but if you can’t find the picture you want, what good is it?  Also remember that all the revisions to your picture files are stored in the Lightroom Catalog.  If you lose the catalog, you lose everything you did in the “Develop Module”. You are back to the original files!  That’s how non-destructive editing works. Yes, you always have the original file to go back to which is very important but all the revisions are stored separately unless you export the revised version to be saved. One option might be to shoot in RAW, make your changes and then export the new  optimized file to  jpeg in the same location.  This might give you the best of both worlds if the Catalog is lost. Best solution; Back-up, Back-up, Back-up!

Feel free to leave a comment and/or share this article.

Eagles in winter

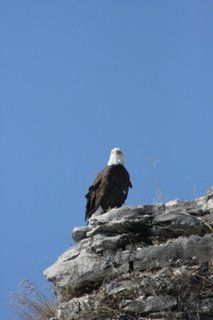
Winter around the Sriner household often revolves around the annual quest for the Bald Eagle. This year was no different.
 Click on the above and other pictures to see them full sized!

January of this year, brought with it a trip to the operating room for Pat. She had to have major shoulder surgery. The surgery was extensive but she has been recuperating very quickly. During her 6 weeks off work, we practiced retirement. The freedom was great! The end of the practice period and the subsequent drop back into reality SUCKED BIG TIME! Although I am already semi-retired, there was no guilt relaxing while we were both home but once Pat had to start punching a time clock, my responsibility gene  started showing its ugly head again. I could not just sit at my computer and work on pictures or study new ways to manipulate them in Photoshop. I started looking at my watch thinking, “I need to do something to justify my time”. The trouble is, when your heart just isn’t in it, there is a great deal of wondering getting ready to work. It is hard even now to type that nasty four letter word. WORK. I’m not good at goofing off so I certainly won’t ever completely retire but the difference is  the “have to” and the guilt. I can still hear my step-dad and his always demeaning manner. “Don’t just sit there, be productive.” haunts me still. Artistic pursuits that require periods of sitting resonate deep inside as non-productivity! I feel guilty reading or studying or tweaking pictures or writing my blogs.  Having recognized the problem is making it a little easier to pursue my God given artistic endeavors. But I still look around to see if anyone is watching me goof off at the keyboard. During our practice retirement, I felt much less of this distraction. If Pat is wasting time reading a book, I can waste time on my artistic outlets. June can’t come too soon for me!

“So”, you ask, “What about the eagles?” OK, I’m getting there. For me, my first eagle sighting many years ago was an awakening of my spirit. I don’t understand completely why but I am captivated by their majesty. The desire to capture that spirit in pictures really opened me to photography as a compulsive artistic drive. Once I had a soaring American Icon in my viewfinder, I was hooked. But my tools were far exceeded by my desire to get that perfect image. I wanted images that I could share with others so they too could experience the feeling I got capturing the marvelous raptor in my camera. Each year brought a little better camera or lens. My weapon of choice now is a Canon D7 with a 400mm “L” series lens combination. This is about as far as I can go without another mortgage on the house. At this point I would need to go from thousands of dollars to tens of thousands. With retirement just around the corner, that jump will probably never come. Fortunately, at this time in life, I have come to grips with this drive for the biggest toys because no matter what you get there is something just a little bigger, a little better. I am ready to accept that fact and simply do the best I can do to learn how to use the tools I have.

OK, OK, I’m getting there. Eagles are basically fish eaters. Sure they will, on occasion take a duck on the river or a rabbit in the field but they nest and usually hunt on the rivers. As winter starts to swallow up the open water in the north, the eagles will start migrating south for food. Around here, they are found as they migrate along the Mississippi and Illinois rivers. They need open water to feed so as the river freezes, they are drawn further south. Along their journey, they will often stop at the Locks and Dams along the river because the water rushing through the gates or turbines won’t freeze. This provides them with the open water to fish. For than reason, they will congregate in large numbers at these locations. It is not unusual to see 25 – 30 in a single tree. Sometime even more when the river is nearly all frozen. But in the event of warmer weather, the river is not frozen over as much and they will spread out along the river due to the lower competition. There are probably as many eagles in totality but they are not bunched up. That has been the case the last couple years.

There is one favorite place along the Mississippi that attracts photographers from all over the country. That sweet spot is Lock and Dam #14 in northern Illinois near the Quad Cities. What makes this spot so special that it draws crowds all winter, is the configuration of the river. There is a small bay where stunned fish can often be seen floating on the surface. The eagles find this a perfect hunting grounds and the near-by observation walk has no visual barriers between it, the water and diving eagles. Every eagle photographer has pictures of  an eagle perched in a tree but to catch a shot of the dive and capture of the fish is the true feather in any nature photographer’s cap. Many can go for many years without the opportunity to make this capture. L & D #14 seems to give the best opportunity to make the capture. Photographers from across the country will line the walkway with $20,000 camera set-ups.

This is a small weekday crowd.

Most of these photographers are from out-of-state. You will notice the buckets by several of the shooters. No it is not to store fish they catch. They are full of fish used to bait the eagles. While some will question the integrity of this practice, it is common here. They will use compressed air in a can to bloat the fish and toss it in the river in hopes an eagle will swoop down for a catch. The eagles don’t seem to mind the easy pickin’ and the photographers are overjoyed with the results. Many of the baiters are professional photographers who offer “eagle safaris” to the participants. I won’t pass judgement but I will say it works if the eagles are there.

An adult eagles swoops in for the floating fish
one leg catch
Hold on tightly and we are off

One thing I have learned over the may years I have chased the elusive eagles from site to site, is that they are unpredictable. The population can not only change from day to day but hour by hour.  But it is worth the try and the wait when you are rewarded with the above shots.

As the days begin to lengthen, most of the eagle pairs know it is time to head back north to  get the nest ready for the spring hatch. New eagles will be born in the North Country and when winter spreads the blanket of snow and ice over the region again, the eagles will return to our backyard and I will again be able to spend the winter trying to outguess their location. But next winter, we won’t be limited to the all too often cloudy weekends. Next year these same dives will be in sunny locations and the beauty will be multiplied many times as I am able to be seen ever so much more clearly.

Perhaps  by next winter, the above juvenile will have graduated to the adult white head and I will see him in all his splendor.

You can see more of my magnificent eagles at: my Smugmug Gallery Click on the preceding link  to see more.

The New World of Photography

When I was growing up, my first camera was a Tower box camera. I think it was a Sears brand. Obviously, it was film and it had a simple fixed lens. I even had a small film developing set to print my own black and white pictures. It was fun for a while but I was way too young and impatient and yes, a bit lazy to print my own. It was too much trouble. Once I started working with color film, there was no desire to develop and print my own pictures. I would take my film down the the local drugstore and they would ship it off for processing by Kodak. A week later, I could look at the set of bad snapshots. There must be a better way! Then I found girls and had no time for photography!

Fast forward until after I was married. We loved to travel and nothing goes better with travel than photography. I got my first SLR film camera. It had many of the new features like a split screen focus and built in light meter. The split screen focus showed the picture in the lens-finder as a split picture from top to bottom. The two halves were offset from each other and as you brought the picture into the proper focus, the two halves would move in opposite directions until they lined up perfectly. Snap and you had the picture. Proper exposure was achieved by watching the light meter in the lens-finder. Adjusting the shutter and aperture would move the light meter needle to the center and proper exposure. Now think about all that and take a picture. It was not all that easy. Focus, adjust speed, adjust aperture, readjust focus and snap. Now add movement as you pan to follow the player running down the field. It took a lot of dexterity to get the shot in focus and properly exposed. Would you like to now add a zoom to the mixture. Not too many soccer Moms getting decent photos of Johnny making the touchdown. Landscapes were not too hard to get a decent shot but if movement were involved, chances lessened drastically. All this talk about the past is boring even to me and I am writing about it. Why even mention it? I mention it because it shows just how far we have come and I didn’t even go back to the true beginnings with big billowed box cameras and flash-powder. What were they really doing under that black tent?

Computer: enter stage left. Talk about change, remember all those adjustments I had to make with my first SLR. Now, the little computer inside the camera does all that for me if I want. To help me still feel important, they add the manual mode. For those purists out there, still hanging onto that thought pattern, and their loftier than thou, attitude, who propose that a good photographer shoots RAW in full manual mode, I say, go back to the old film camera like I had in the 60’s. If you are going to promote the values of the pure photography, do it without a net. Take your pictures and then go have them developed or develop them yourself and see if all your settings are correct. If they are not, you have to go back to the site and do it all over again! Oh wait, the game is over or the wedding was yesterday. OOPS! Sorry! There are a few photographers I know personally who could do that and do it right the first time but they are all old times who like me had to do it that way. If you were a professional photographer back in those days, I certainly respect your skill set.

So, what am I saying? Am I proposing you go get a new model high end camera and point the dial to the green box “automatic” ? No, that isn’t what I am saying. But I am saying, you spent a lot of money on that camera let it do the “busy work”. I seldom due “manual focus” but I do use the spot meter to pick my single focus point. That way the camera does not focus on the tree when I am shooting the deer behind it. I lock focus on my subject and then recompose and shoot. If I am shooting moving subjects like an eagle in flight, I set the shutter speed at around 1/1600 sec. I let the camera determine the ISO and sometimes the aperture also.  For most other shooting, I set the aperture and let the camera set the shutter speed. The aperture determines the depth of field. Only I know for sure what I want there but the newer cameras are getting fairly smart at guessing at it.  After I take the shot, I can look at the capture in my screen and see the histogram to be sure I got it right. I will go on record here to say that I worked so long without a net, I often forget to use it. This is not something I recommend nor am I proud of my failure to use it. You don’t have time to check each shot but give it a quick glance just to be safe. There is nothing worse than hiking back from a waterfall and finding the dial had inadvertently been bumped and was setting the exposure 2 stops wider. Everything was blown out! Real Bummer!

The title of this blog entry was “the new world” and all I have been talking about was the past and present. Where are we going? I see the field of photography changing dramatically. WE have made the physical characteristics of cameras and lenses about as good as they are going to get. Now it is the software and hardware’s time to shine. I see photographers spending a lot more time on the computer and less behind the camera. This is already true for the portrait photographers. The size 16 bride wants to be photographed as a size 6. The wedding in the backyard wants to be presented as being on the beach. Make the cloudy day bright and sunny. These things are all possible now. But I see the buyers less receptive to what was and demanding what they wanted it to be.

Recent advances in HDR photography make it possible to see even better than the human eye. There was a time you had to move subjects away from the bright windows because you could not expose for both the subjects and the window. With HDR, you can. Suddenly the view outside can be just as clear and the dark indoors. This is possible now but some cameras are doing this automatically now. They take multiple shots and merge them into an HDR picture file. I think there will be advances in the sensors so that this won’t even be necessary.

I also think we will see a difference in how pictures are displayed. Gone will be the family picture wall. To replace it, wall mounted HDTV will show continuous slide shows of the family. Using a simple search will bring up Little Sis pictures that will run throughout her birthday party. The large screen will display the travel photos when it is not being used for TV viewing. Dedicated viewers will contain Dynamic still shots. An example will be a movie of a waterfall. At first glance, it will look like a normal photograph but then you notice the waterfall is falling. The trees are swaying in the breeze, occasionally, a local bird or other animal will move into the frame. The background will contain all the sounds from the scene with a quiet background accompaniment. These dynamic stills will be purchased or rented like a DVD. The pictures will be designed to be non-distracting if you are trying to converse with someone but will be more like looking out a window. Some might be dedicated viewers simulating a window that looks out over the neighbor’s house 3 feet away. Got a condo wedged between two other units. The “Dynamic window” will still give you a view on the side complete with warming sunlight. Other seemingly static photos will be Zoomable. The touch screen will take your touch to indicate you want to zoom in to that now illuminated dark alley or cave. Super slow motion will bring in a thunderstorm almost imperceptibly. Remember watching the aquarium for hours and remember how calming and restful it was? This will be one step further.

My advice to young aspiring photographers, learn your equipment first but then learn the hardware and software that will be used to present your new dynamic art!

My Journey Through Photography

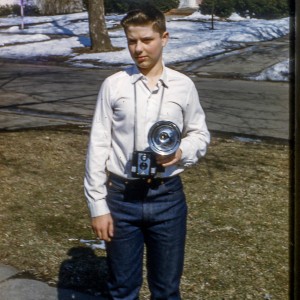
DSDgtls_4FB--27As I recall, my first camera was a tower box camera. It was a box about 4 – 5 inches square. You held it about stomach height and looked at the viewfinder on the top. It was like a Kodak brownie. This was the mid 50’s. My, how cameras have changed.

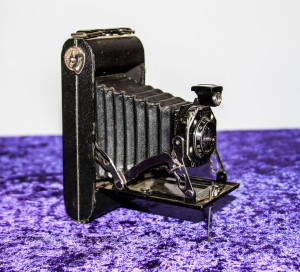
Below is a Kodak six-20 from about 1940. cameras-2707-1

I got my first 35 mm SLR shortly after I was married. It was a Yashica. Nothing was automatic then! The most automated feature was the built-in light meter. By setting the size of the opening, Aperture and by setting the time of the exposure, the little light meter in the viewfinder would show up indicating amount of light entering camera. The object was to get the needle into the center of the scale. Open the aperture, and the needle would go to the right. Speed up the exposure (less time open) and it would go back to the left. Any combination of correct settings would bring it to center. The first time you got film developed, you found that although there were many options for proper exposure, they were not all successful in giving a good picture. If there was any movement, and the shutter stayed open too long, the picture was just a blur. If you moved the camera any with a long exposure, there was just a blur. It didn’t take too long to see that an exposure time of 1/30 sec was about the longest you could use without a tripod. If there was any movement of people, you better have a speed of about 1/60 sec or less. You also noticed that if you were using a telephoto lens at a distance, you better shoot at a faster speed. Shooting a bird with a 200mm lens required a shooting speed of less than 1/200 sec. It became obvious at first that the speed was the most important variable to master. So, depending on the type of picture, I would usually set the shutter speed first and then dial in the f-stop or aperture until the meter registered in the center point for the perfect exposure.

The first time you went to the drugstore for film, (yes, that was where most people got film and had it developed) you learned about the film ASA. I knew a little about film and 35 mm was the size of the film I used. I could get 24 exposure rolls or 36. I would buy color print film because I wanted to get a print of the picture. My Dad bought slide film because he would show the pictures on a screen with a slide projector. I guess that was the first “Big Screen”. Niagara Falls on a 6 ft screen was impressive. OK, so I walked up the the counter and asked for 35 mm, 36 exposure Kodak print film. I wanted to sound like I knew what I was talking about. The clerk replied, ” OK, what ASA do you want?”

” Huh?” was my reply. That is when I learned about film speed. I knew about shutter speed but now I found out there was also film speed. Film with a high ASA would work with less light. I could get 25 or 64 ASA. Later I found out about high speed film with an ASA of 400. That was 16 times more sensitive than 25. That was impressive. Unfortunately, the higher speed film came with a drawback; it was grainy. This was not an easy decision. If you had fast film and it was a bright sunny day, it might be difficult to get pictures that were not over-exposed. Going too low might limit pictures inside without flash. It seemed like the more I learned, the less I knew.

Every time I wanted to take a picture, I had to decide what film to use. What if I have taken just two shots on a good low speed film and then go into a candle-lit cabin and need high speed. Should I roll up the film in the camera and waste most of it or forget about the inside shots. I did learn that I could roll up the partially used film, note the number of pictures taken and then roll it up without loosing the leader. Then I would put it away and put in the faster film. Later when I wanted to go back to the slower film, I would have to put the partially used film in the camera, advance it past the already used portion and start shooting again. It was not an easy process. Once the film ASA was decided, I had to decide what shutter speed to use. Let’s see, we are at a colorful parade outside in the sun. I’ll put in ASA 64 Kodacolor, 36 print film. I load the film and make certain the end is properly caught in the take up reel. Advance the film several shots to be sure it is past the exposed leader. Screw on my 50mm lens and set the shutter speed to 1/250. OK, ready! Where did the parade go? I guess it was a short parade!

As you read this, you might say, “It doesn’t seem like it is worth the trouble.” Did I mention, you also have to focus the camera yourself on a split screen view finder if you have that luxury option. You look through the viewfinder and in the center, there is a circle. your image is split between top and bottom. To focus the camera, you had to line up the top and bottom to get focus. Now fire away but not too many shots because every roll will cost perhaps $20 to develop. Is it any wonder why we bought pictures of vacation spots rather than take them ourselves?

Now, even the cameras on our cell phones do all this decision making automatically. The better “point and shoots” will not only analyze the type of picture we are trying to take and decide the proper aperture, shutter speed and sensor ISO (like film ASA). Then they focus on a spot or group. They will even compare the faces of the subjects and focus on “known faces”. They do it almost instantly and “click” you have the picture you want and it is almost perfect!

So, to those who say, “shoot fully manual” I say, “no thanks, been there, done that. Let me do some tweaking but let that tiny computer inside my camera do the busy work! “

Where Eagles Soar

Last year I wrote an article on the magnificent eagles and where and how to find them. I have posted this article on my website. It is in PDF format. Here is a direct link:
https://sriner.com/Where_eagles_soar_with_pics.pdf

I have new eagle pictures from the Grafton IL area that I will share on the next post. I have been working on my taxes, what can I say.

Computers and Lost Data

Computers and lost data go together like gambling and losses or old age and forgetting. Eventually, it will likely happen to you. In the case of gambling, the secret is to quit while you are ahead. I did that 40 years ago. With computers and old age, the solution isn’t as easy. As I suffer from both the remaining maladies, my solution is proper data storage. If I need to remember something, I write it down. My bills all go on my Outlook calendar and when they are paid on line the confirmation is also embedded into the Outlook notation. This works very well for me until I have a computer crash. You will notice here I didn’t say if I have a computer crash; I said when I have a crash. So, why do you find this posting on a photography Blog? Because even more important to me than notes of things to do, are the thousands of un-replaceable picture files. If I lose my Outlook files, I might have a few overdue bills and some late payment charges; if I loose my picture files, I loose a wedding or a vacation to some far off place. I also would loose the babies first step or the last picture of a missed loved one. These things can never be replaced. While picture losses are not limited to digital pictures because more than one old family picture has been accidentally thrown away or stored in a damp place but the likelihood of loosing not just a few but all of them is much more possible.

You need a storage plan and there are many options from on line storage to book shelf back up hard drives. Here is my strategy learned from over 25 years computer use:

1) The most likely computer crash is the loss of the primary “C” hard drive. It gets the most use and is often the target of virus programs. This is the normal drive holding your “My Documents” file which usually holds e-mail, picture, music, and many other personal files. I don’t have “My Documents” on the “C” drive. I have it on a separate drive. And because I have so many pictures, I have one drive just for pictures. These drives see less use because they are only accessed for these particular files. Program files, page files and other operating system files are on the primary “C” drive. This is my fist line of defense. Some people partition a single drive into several partitions to separate files in a similar manor but this will not help protect the data. If a drive containing 3 partitions fails, all thee partitions fail. With the newer OS, I see no need to partition a drive into multiple logical drives.

2) Again because of the quantity and value of my picture files, I have a second networked computer used just for back-up files. When I download pictures from my camera, I put one set of files on the picture HD on the primary computer and then a second copy of the same files on the back up computer. I check to be certain I have two copies BEFORE I delete them from the camera memory. I also use this back up computer to make a copy of the “my Documents” folder on a regular basis.

3) You might think this should cover my potential losses but just to be on the safe side, I also back up on DVD media. While they don’t last forever, they make a good “ace in the hole” for picture file restoration. These are usually family pictures.

I don’t bother to back up program files because I can always reinstall them. If you download sofware as I often do, be sure to back up those files for recovery. That is a good use for CD or DVD back-ups.

I have had computer crashes more times than I care to count and most of the time, I have been able to recover needed data. The only exception had been two occasions loosing my address book from Outlook. Now those files are backed up automatically every time I shut down Outlook. They are backed up to the backup computer if it is on and to a second backup hard drive on the primary computer. Yes, I do have many hard drives. That is one reason I build my own computers rather than buy off the shelf from Dell or any other computer manufacturer.

I am not suggesting everyone should go out and buy multiple computers but when you upgrade that old slow machine, it might be just what you need for a back-up computer. It doesn’t need to be fast or even have the most recent operating system. It just needs some storage space. Back your files up to it and then turn it off.

Well, the “T” on this keyboard is no working properly so I’ll qui for now and go ge a new one.

Happy New year and may your New Year’s resolution be “Don’ loose it; back it up!”

[ 1/23/14 update ] This was originally written on another of my blogs back in 2007 but the message is the same.  Now, I still do the same thing but don’t copy to DVD. I looked into cloud storage but for me, it was way too slow for all that I had to back-up.  I have about
10 Tb of combined storage.

New Christmas Cameras

I don’t remember the statistics, but more and more people are taking digital photographs than ever took pictures before. This Christmas should increase that number significantly. Here are five of the most important tips for new digital photographers.

1) Many of the cheap film cameras had fixed focus lenses. That means the lens was designed to capture subjects from about 5 feet to infinity, depending on the lighting. As long as the conditions were just right, they could take great pictures. But the newer digital cameras are usually better quality and they focus the lens from close up to far away. For these cameras, there is normally a two position button. When you depress it 1/2 way down, it focuses on the subject and then when you press the rest of the way, it opens the shutter and takes the picture. With the old cameras, you just press the button and almost instantaneously, the picture is taken. If you do the same thing now and press the button all the way down there is a lag time between pressing the button and taking the picture. If you press the button without giving it a chance to focus, it is often taking the picture while you are moving the camera for the next shot. If you find yourself chopping off heads or getting blurred pictures, this is probably the problem. Steady the camera, press the button 1/2 down to focus (usually there is a red dot or a beep when the picture is in focus) then press the button the rest of the way and hold the camera still for a couple seconds to be certain the shutter is finished opening and closing.

2) If your camera has a view window for composing the picture rather than a viewfinder, try to hold the camera close in to limit camera movement. If you move the camera while it is taking the picture, it will blur. If you are zoomed in on something the potential for blurring is increased. If your camera has both a viewfinder and a screen, it is best to use the viewfinder because keeping the camera pressed against your face will held to keep it steady. Holding the camera at arms length, makes it difficult to keep the camera steady. The image stabilizers will help but can’t control it completely especially if you are in dim light of zoomed in.

3)The flash memory supplied with most cameras is usually minimal. The low capacity often will force you to reduce the picture quality to be able to take more pictures. This hurts in two ways. The reduced capacity forces you to take fewer pictures and often pushes you to set the picture quality to lower settings either by reducing the number of pixel’s in the picture and also in reducing the quality of the compression. I recommend setting the number of pixels to the highest number. Why get a 6 mega pixel camera and set it to record less than 2 mega pixels.

4) Digital zoom is worthless because it doesn’t actually zoom in on a subject, it actually just cuts away some of the extra background. The quality is reduced. If you digitally zoom in on something to make it twice as big, you actually reduce the number of pixels to 1/4. This fact is not true of the optical zoom. If you zoom in to an object to make it twice as large, the original number of picture pixels is the same as without the zoom.

5) Digital cameras can’t see contrast as well as your eyes can. If you look at someone in a shadow on a sunny day, you can see the bright portion of the sky and the shadow portion of the subject. The camera can’t. If it sets itself to capture the bright sky, the shadows will all look too dark to see anything. If you set the camera to picture the parts in the shadow, the sky and rest of the picture will be so bright they will wash out. So, even on a sunny day, you might need a flash to show faces in the shadow. It is probably needed more outside to show faces than inside where there is less contrast.

See it; Take it!


A picture is an instant in time; frozen and captured forever. That picture is only available for that instant, then it is replaced by another instant ready for capture. I can remember sitting around a local lake club as a kid listening to the fishermen talk about the fish that got away. They were always the biggest and the best. Pictures are often like that too.

Have you ever seen a sunset that was more beautiful than you had ever seen before, but by the time you found just the right spot to stop and take a picture, it was gone. Sunsets are one of those fleeting moments. Sometimes you have to be content to just see it and enjoy the beauty but not capture it for everyone to see. This will be one that got away. You can talk about it to your friends, but all you have is the memory.

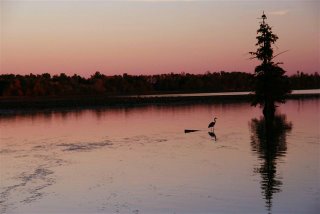
The sunset above didn’t get away. It was taken at Mermet Lake, a lake in Southern Illinois near the Cache River system.

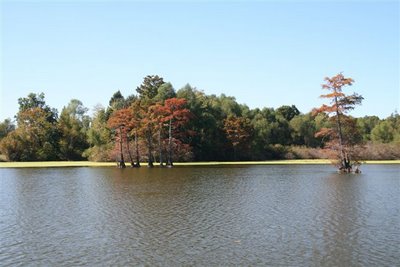
Above, we have a nice picture of a lake with some fall foliage on the shoreline. It certainly would not win any prize. 15 minutes earlier, it was a beautiful reflection picture. The lake was smooth as glass. I thought, “what a beautiful picture, I’ll be sure to get it on the way back. This is what I got on the way back! If you see a great picture, stop; go back, if necessary; and take the shot. It might not be there on the way back.

I remember another time walking up a long road at Allerton Park and just as we turned the corner, the now visible giant Sun Worshipper statue was upstaged by a beautiful deer standing silent in the middle of the road in front of us. In the excitement, I grabbed my camera and started exchanging my wide angle lens for the big telephoto so I could get the deer full frame. As I raised the viewfinder to my eye, the deer vanished into the woods. Why didn’t I just take the wide angle shot first and then change lenses. At least I could have had a lovely landscape with a deer prominently displayed. Here we had another fish that got away! This was a case of poor quick judgment; however, if he had stayed just a few seconds longer, I would have had a prize winner.

One of the advantages of digital photography is the availability of numerous shots. See it, shoot it. If you don’t like it later, no harm done. There is always the delete button, but I have not seen the camera yet that has a button to add a few more shots from different angles. All the equipment in the world is worthless until you turn it on and press the shutter button.

Other examples of the shot that got away are too numerous to note; but fortunately, I am listening to my own advice and it doesn’t happen nearly as often. We are turning off the main roads with their fast paced traffic. We are taking the roads less traveled in America’s back yard. If you would like to join us on our journeys, you can catch us at http://em-t-nest.blogspot.com/ . But before you try to follow, check out the article on GPS navigation on the em-t-nest blogspot. So, clean the dust off the sensor, buckle up and follow along.